


Table of Contents:
loving the popular DIY faux stone planters? Here’s an easier Version.
If you’ve done a little internet digging, you know that there are many different versions of this DIY project. Some DIY faux stone planters require many hours, even days’ worth of time and effort. I’ve read a few that involve 10+ steps to achieve the enviable result. We don’t have that kind of time, and we are guessing you don’t either.
So, we set about creating a streamlined version to create the same gorgeous faux stone planters in a fraction of the time. We are thrilled with our results, and happy to share them here with you.
If you’re short on time, but still want the look you’ve come to the right place.
We use affiliate links on our blog. Read full disclosure here.
DIY Faux Stone Planter Supplies
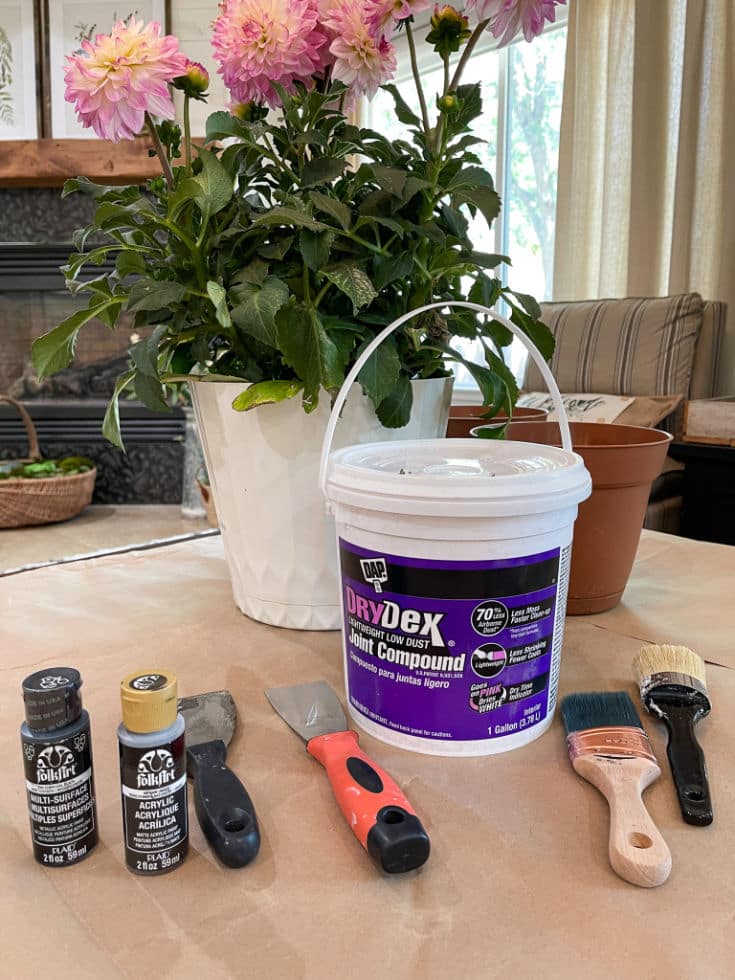
First, gather your supplies. To make it easy, we’ve done the work for you, so all you need to do is click on the items below to purchase what you don’t already have in your garage.
- Joint Compound (Spackle)

- Spackling scraper/spreader

- Paint Brushes
Click on photo below to see lots of paint brush options and supplies and save 10%.

- Antique stain
Click on the photo below to shop all Fusion Mineral Paint supplies and save 10%!

- Fusion Mineral Paint Colors (you can choose)
Click on any of the photos below to shop all Fusion Mineral Paint paints and save 10%!
Here are a few of our favorites:


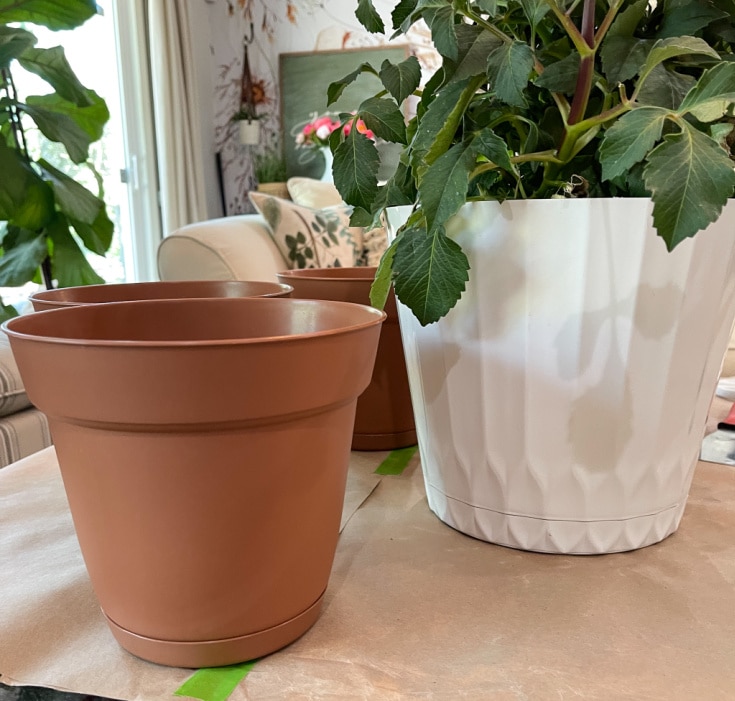
- Plastic planters/pots

- Potted Flowers
Find your favorites at your local nursery.
Easy Step by Step to Create DIY Faux Stone Planters
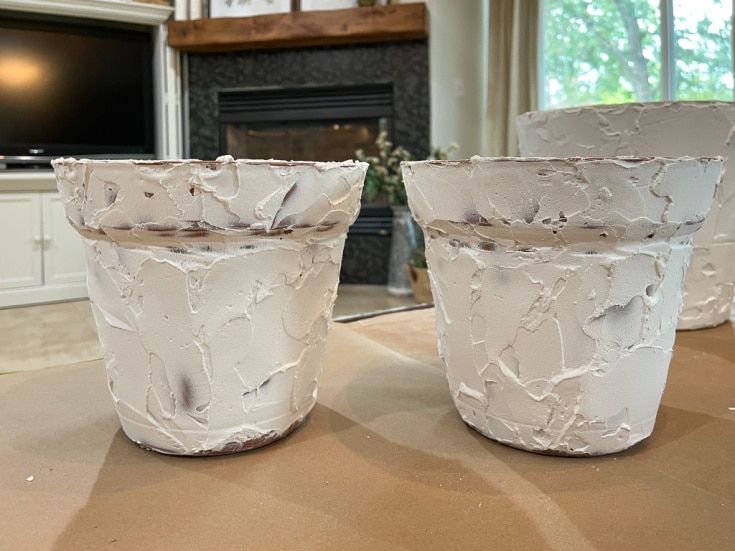
Step 1: Apply joint compound.
Note: This brand of joint compound goes on pink and dries white.
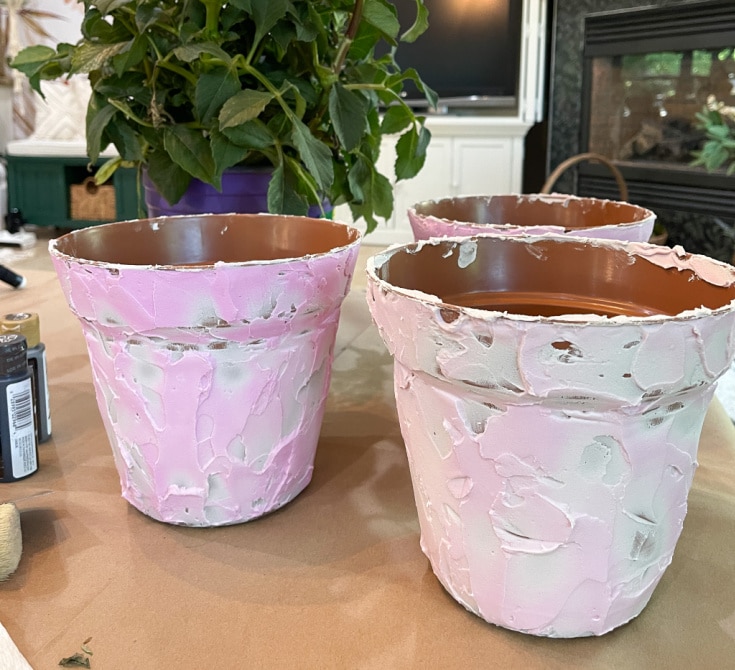
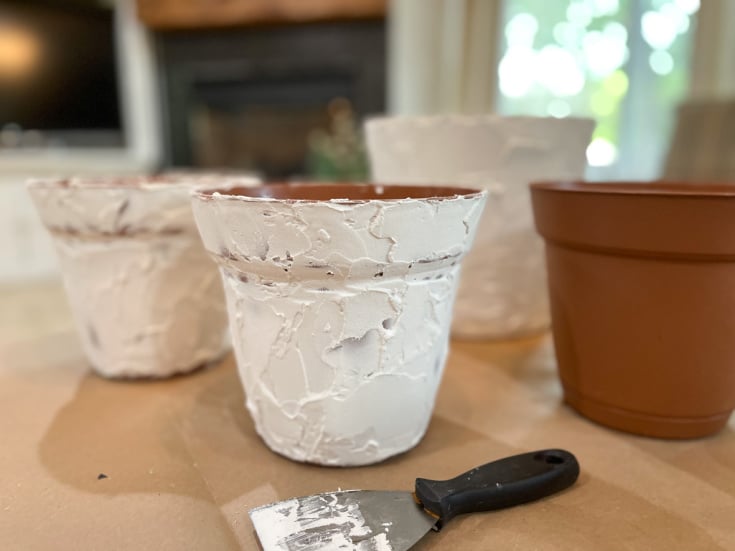
- There isn’t one right or wrong way to apply the mixture to your planter or pot.
- Try different techniques. Experiment until you find the look you want.
- We think it’s more interesting to have pots and planters with slightly different finishes, so play around and make each one unique.
- Try using more strokes to give more texture.
- Then you can also play around with wider/broader strokes to give less texture and give a smoother look.
- Cover the entire surface of each planter and let dry.
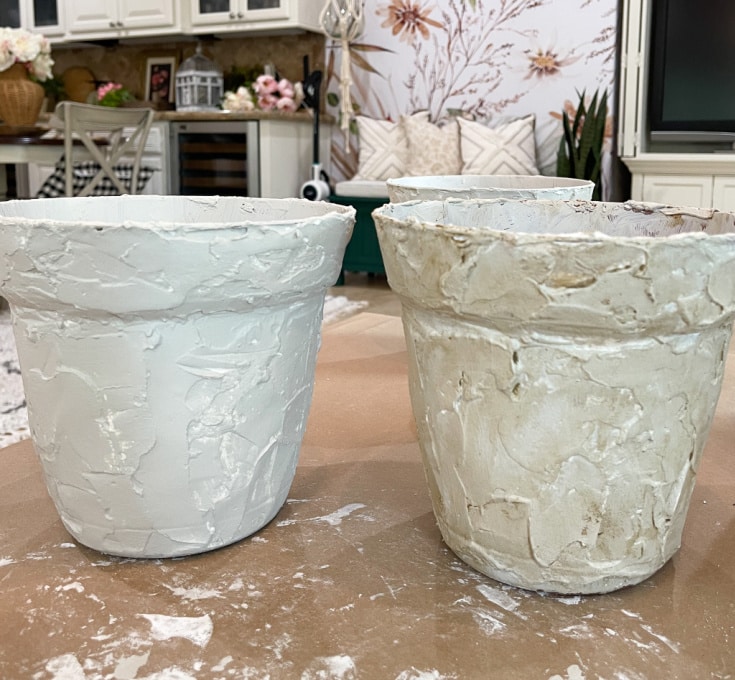
Step 2. Use paint or antique stain.

- Now it’s time to give your planters a look of weathered stone by painting or applying antique stain.
- Again, it doesn’t have to look perfect.
- We love to make use of paint colors we already own, so search your garage before buying more.
Step 3. Add another paint layer.
- This step is optional.
- If you already are in love with your planter skip to step 4.
- But if you’re craving a bit more texture or dimension add another layer of paint.
- You’re not done until you say you’re done.
- Visit our DIY faux pottery post to learn more about painting and creating dimension and texture.
Step 4. Add polyacrylic clear protective finish.
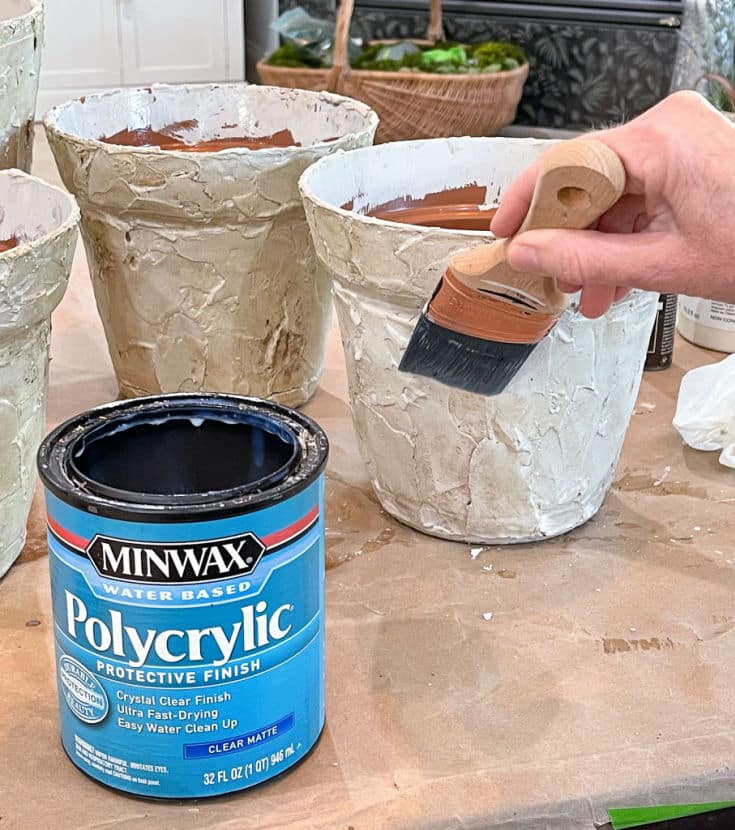
- Unless your DIY faux stone pots are kept indoors don’t skip this step.
- Two quick-drying coats is best.
- This will protect against rain and seal against outside elements.
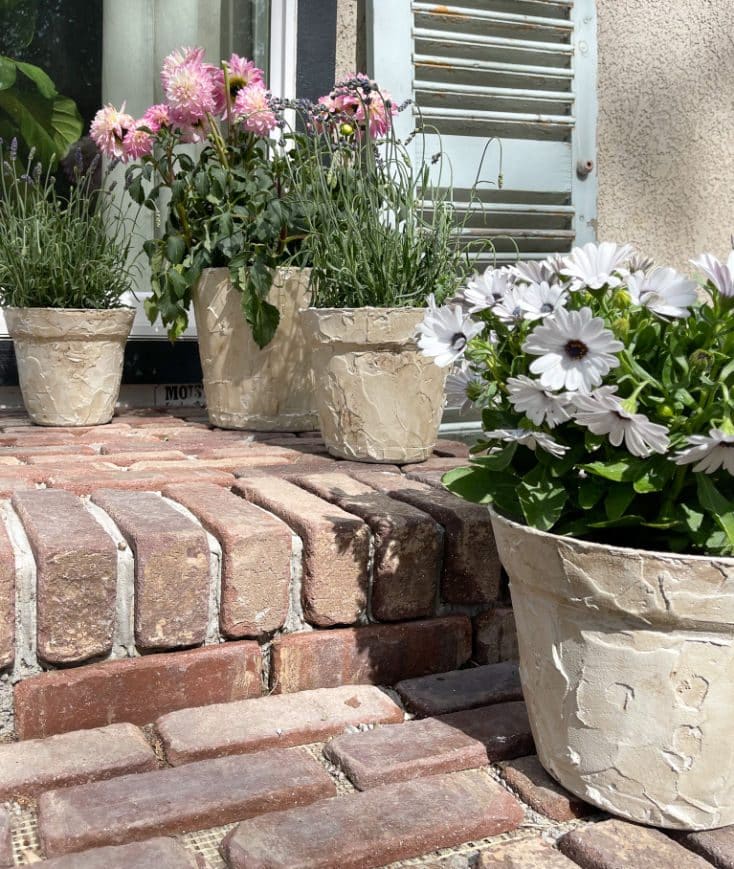
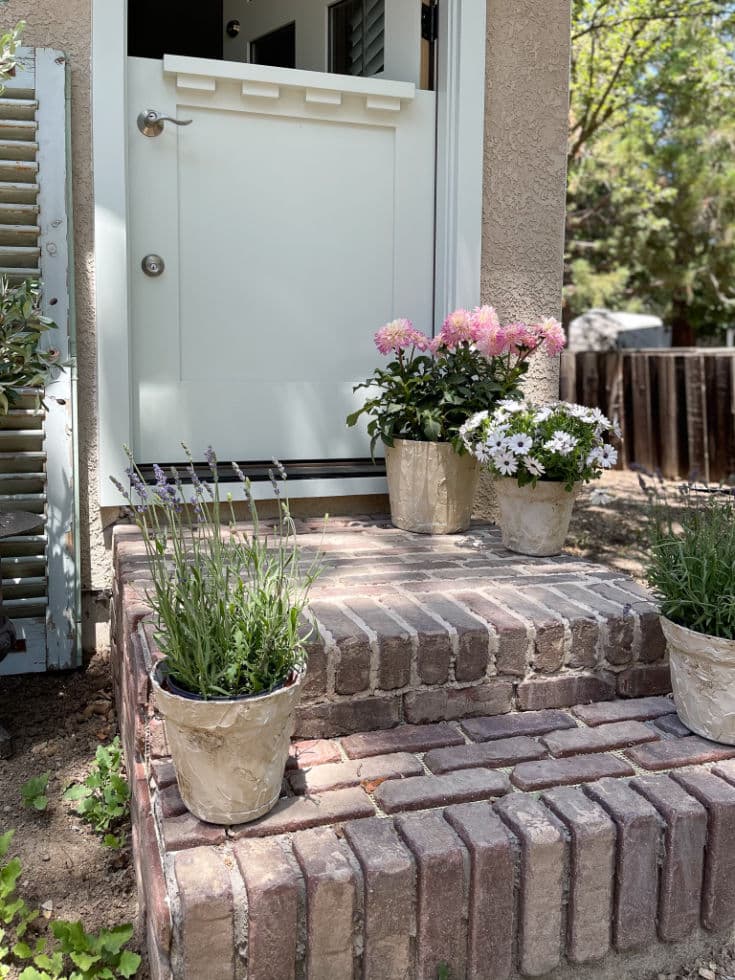
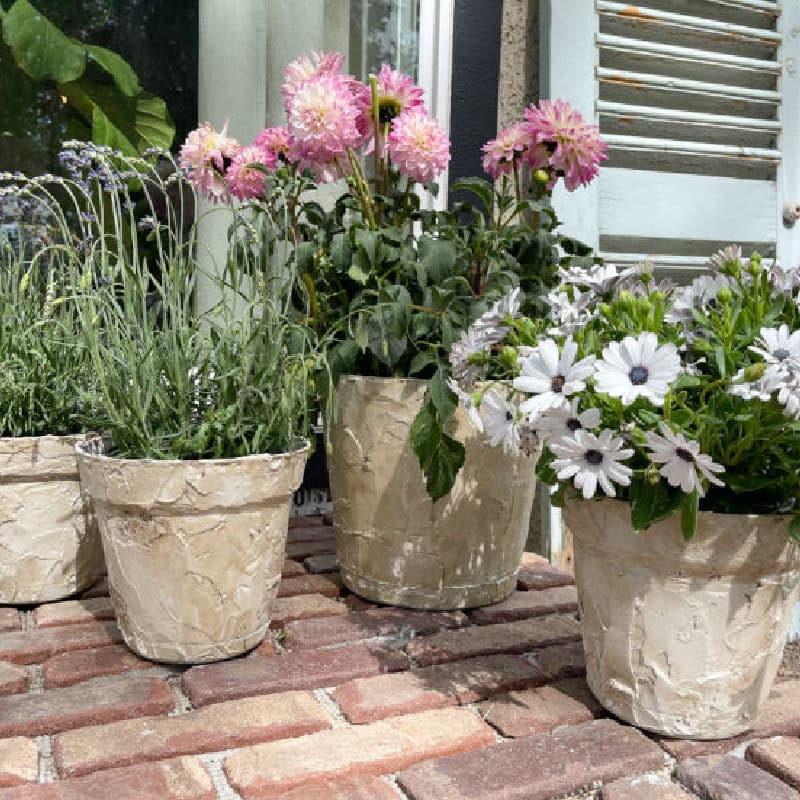
Step 5. Add flowers or plants.
- Once they are dry you are ready to plant your flowers or plants.
More DIY Projects to Love
Our DIY blog posts are our most popular for a reason.
We choose projects that are fool-proof, easy to complete and deliver powerful results.
Here are our top Reader Favorites:
- How to Hang Outdoor String Lights
- How to Make No-Sew Drop Cloth Curtains
- Best DIY Painting Projects
- Create Faux DIY Tree
- Make DIY Pipe Shelves
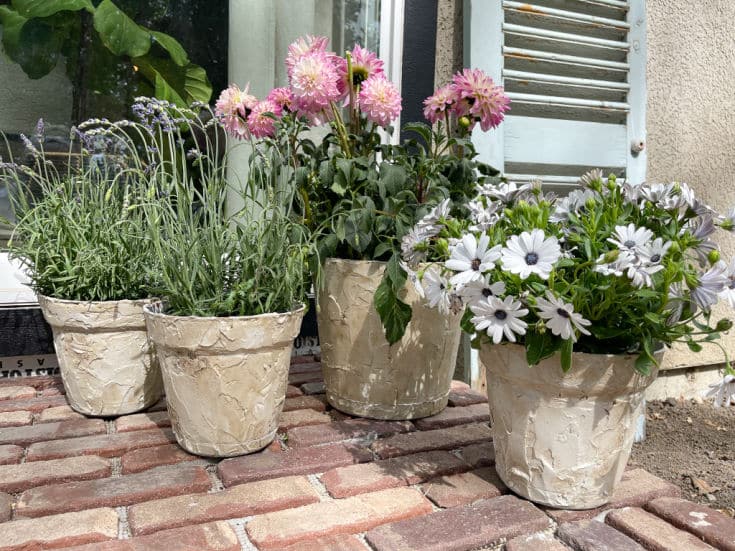
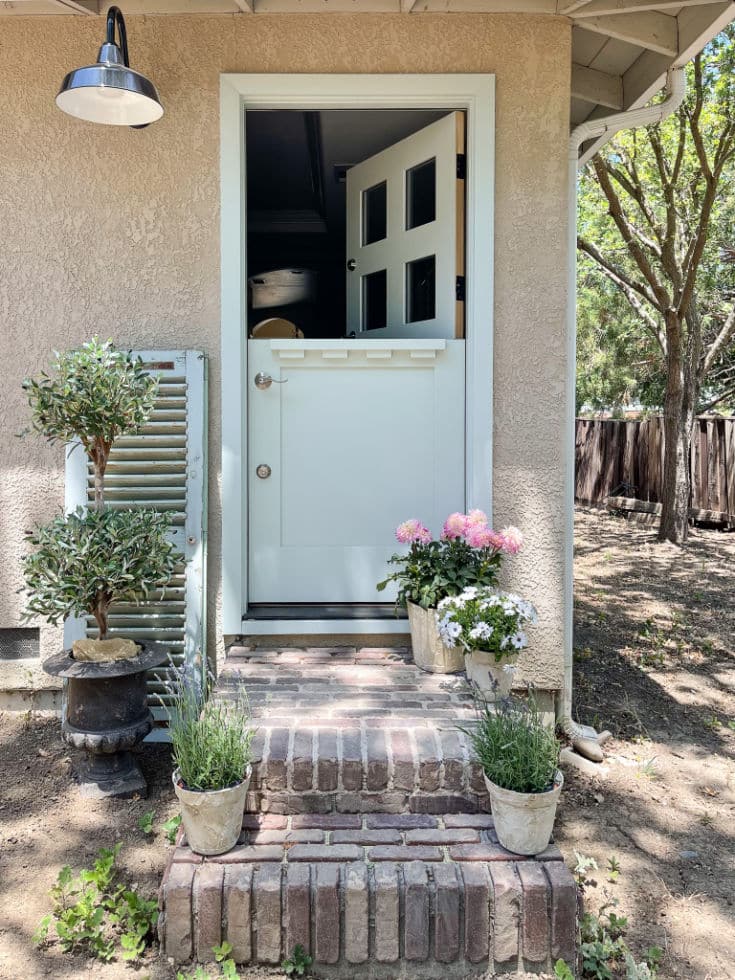
Enjoy Your New DIY Faux Stone Planters
Now it’s time to enjoy. Add your beautiful new faux stone planters to your outdoor spaces. Whether you’ve taken some old pots and made them new or made something inexpensive look fabulous, this project will make you proud and happy.
Anyone can go out and buy beauty. But when we take the time to create something special, we love it all that much more.
So many great aspects of this project.
- It’s very budget friendly! You’ll look like you spent a lot when you didn’t. Bonus.
- This is not a huge time-consuming project. We love that.
- Some of you may even be able to recycle! It’s always a great feeling.
You’ve got this. We can’t wait to hear how they turn out. Leave us a comment if you discover any tips you want to share. If we love the idea, we will update our post. Thanks in advance.
Happy Creating, Friends!


Thanks for making it, it was also my favorite DIY project of the year.
Very cool. Great minds think alike. Hope you continue to enjoy our DIY project ideas, Julie