


Table of Contents:
- Restyle Without Remodeling
- Overview of My Bathroom Makeover
- DIY Bathroom Cabinet Painting
- Step-by-step DIY Bathroom Cabinet Painting
- Why Choose Fusion Mineral Paint for DIY Bathroom Cabinet Painting
- Step Two: Gather Your Painting Supplies
- Step Three: Prep Your Space
- Step Four: Prep Your Surface
- Step Five: DIY Bathroom Cabinet Painting Time
- Peel and Stick Wallpaper
- Final Styling to Complete DIY Bathroom Cabinet Painting and Refresh
- So Many Reasons I Love These Mats
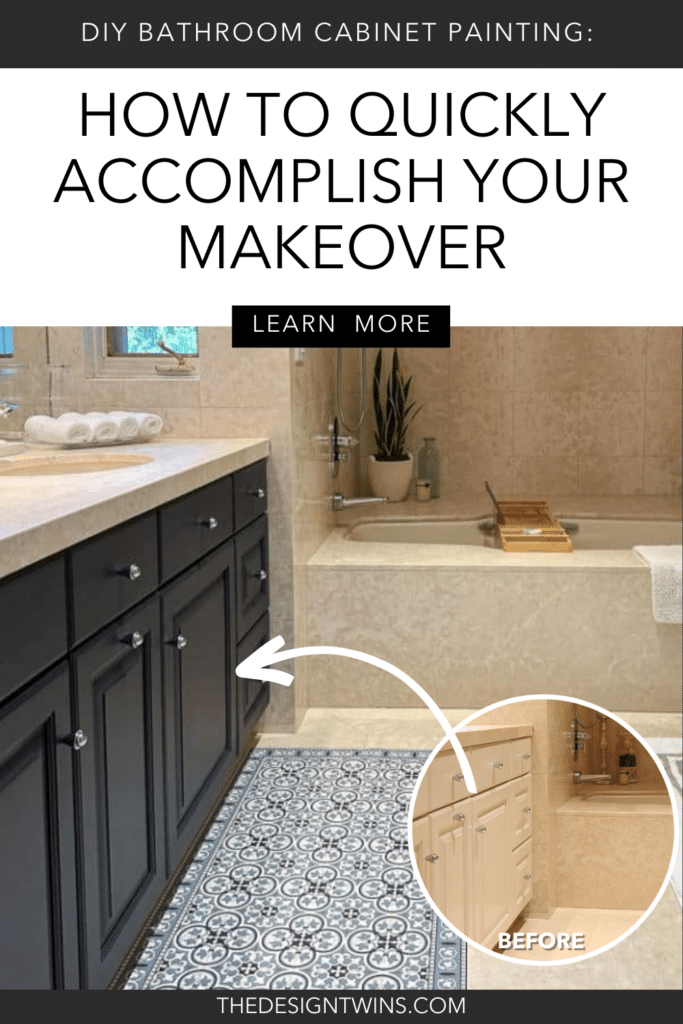
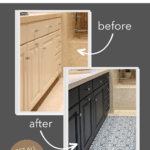
Budget Bathroom Makeover without the Remodel, Step-by-step DIY Bathroom Cabinet Painting, Peel & Stick Wallpaper & More!
Restyle Without Remodeling
This post is for you if you don’t want to:
- Get into remodeling.
- Hire out.
- Spend a lot of money.
- Take a lot of time.
This post is for you if you want to:
- Add plenty of style.
- Create personality in your bathroom.
- Do a little bit of easy DIY (don’t worry, we’re going to show you how)
- Feel proud and happy that you created a whole new look without hiring out or spending a lot.
If you agreed with all or some of the above then you know you’re in the right place. We are so excited to share all our ideas and step-by-step DIY bathroom cabinet painting tutorial so you can transform your current bathroom into a stylish new bathroom you and your family love.
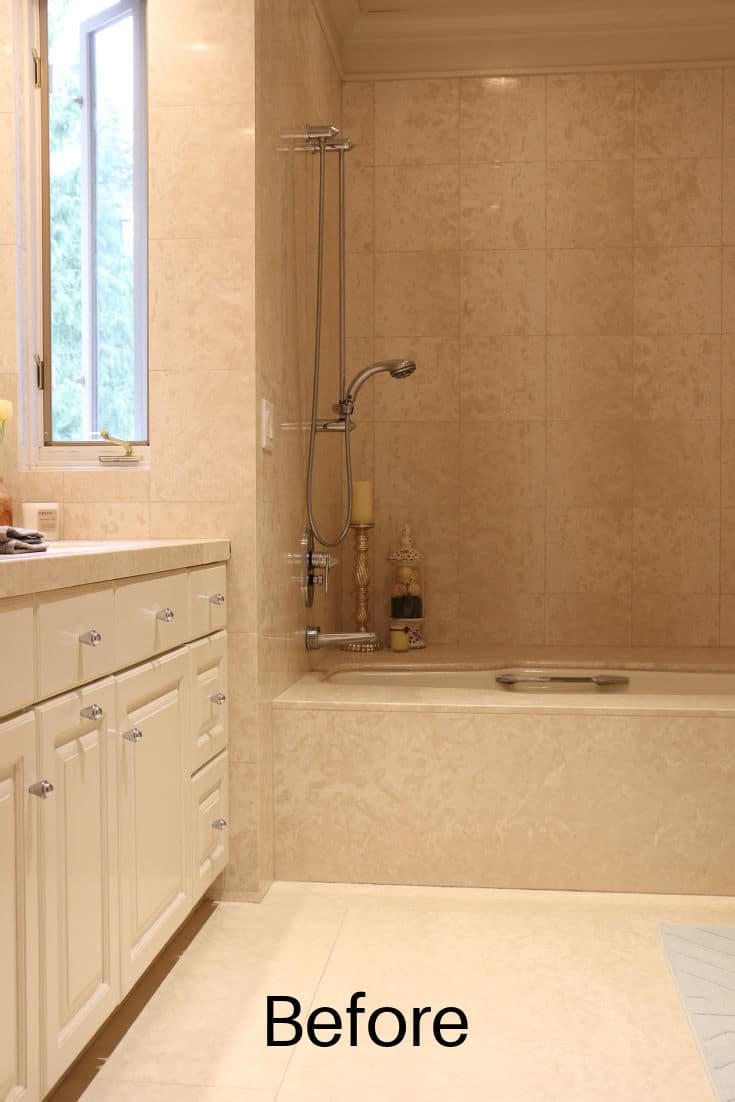
Overview of My Bathroom Makeover
My bathroom restyle incorporated two DIY projects and of course plenty of restyling.
- DIY Bathroom Cabinet Painting. I had never painted cabinets before, so I’m extra proud. I got some good advice before I started from my seasoned pro, aka my twin sis Jodie. And I learned a few things along the way. I’ll be sharing it all.
- DIY Peel & Stick Wallpaper. I am a veteran with installing peel and stick wallpaper. So I have plenty of tips to help you here as well. Visit our blog post for all the tips.
- Styling. I love to style a bathroom. I had a very fun time choosing new decor items to make the room feel extra special. Everything I chose was functional and added to the new style statement I created.
We use affiliate links on our blog. We earn commissions when you shop with us. For complete information visit our legal page.
DIY Bathroom Cabinet Painting
Painting cabinets can be a daunting task. If you’ve never done it before you might assume it’s a job best left to “professionals”.
However, here are the reasons why I think DIY bathroom cabinet painting is a job you can and should seriously consider:
- It’s a relatively small job. Unlike tackling an entire kitchen, painting bathroom cabinets is doable.
- You save a lot of money doing it yourself.
- Pros these days charge a lot, and there’s still no guarantee you’ll love the job they do.
- When you do it yourself you are in charge. You set the timeline. You don’t have to wait until the pros are free.
- And finally, there is great satisfaction in saving money and succeeding at something that challenges you.
You’ve got this. And we’ve got you!
Step-by-step DIY Bathroom Cabinet Painting
Step One: Choose Your Paint
This is the fun part. I love choosing the color. If you’re nervous about choosing you can always bring in a decorator who specializes in paint colors. (It’s cheaper than repainting.)
Maybe you have a good friend who is a decorator or designer or who just has style you love and admire.
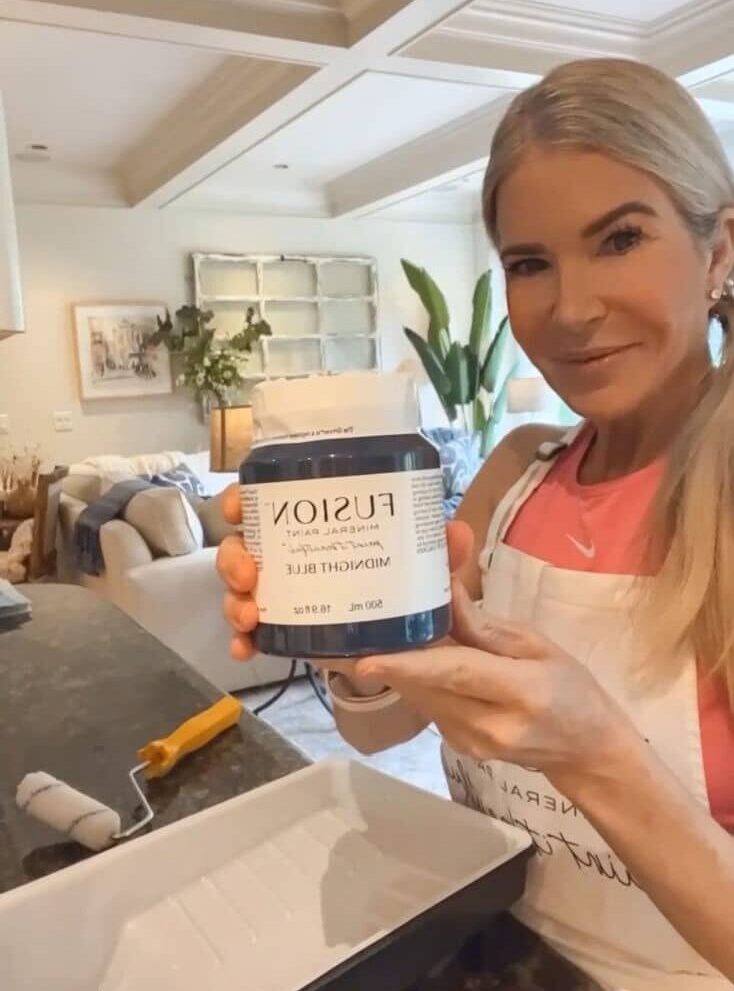
I highly suggest using Fusion Mineral Paint. It made the entire process easy.
Why Choose Fusion Mineral Paint for DIY Bathroom Cabinet Painting
- Fusion Mineral Paint gives off little to no smell. This is amazing. It’s non-toxic which is a big plus in our book. You will love this aspect and so will your entire family, including your pets.
- All Fusion™ products are non-toxic, lead free, virtually odorless, and contain no ammonia or formaldehyde.
- Fusion™ can be applied to most previously painted or coated surfaces without priming or significant prep work.
- It is highly pigmented but thin. This means you need to apply less. This also means that it goes on super smoothly, so you work more easily, and you have less arm fatigue.
- Not only is Fusion Mineral Paint easy to use and perfect for beginners and pros, but it can also be used on virtually any surface. No primer is needed. The topcoat built is built right into the formula.
- It dries fast, so I was able to complete the entire painting project in under 2 days. And I had a lot of cabinets. You can paint the second coat after about two hours.
- Fusion Mineral Paint has tons of stunning colors. They are so good at creating colors we feel it’s hard to go wrong.
- Fusion Mineral Paint has a gorgeous matte finish. This means an almost zero reflectance value that allows you to achieve a beautiful smooth matte finish with no brushstrokes in sight.
- We have a savings link just for you! This link automatically saves you 10% off all your paint and all your supplies.
I’ve recently completed three separate Fusion Mineral Painting projects, and I basically won’t use any other paint now.
Step Two: Gather Your Painting Supplies
You will need the following supplies before you begin:
- Drop cloth(s) – We prefer to use heavy-duty reusable burlap tarps. They stay put better. It’s great to be able to use and reuse.
- Paint tray(s) – Here we prefer disposable or at least disposable liners.
- Paint brushes and/or rollers. We also recommend shopping Fusion Mineral Paint. They have the best brushes for their paint. They also have the right sponge rollers that work best with their paint. Because of the nature of the mineral paint, you’ll want to use small sponge rollers.
- Painter’s tape
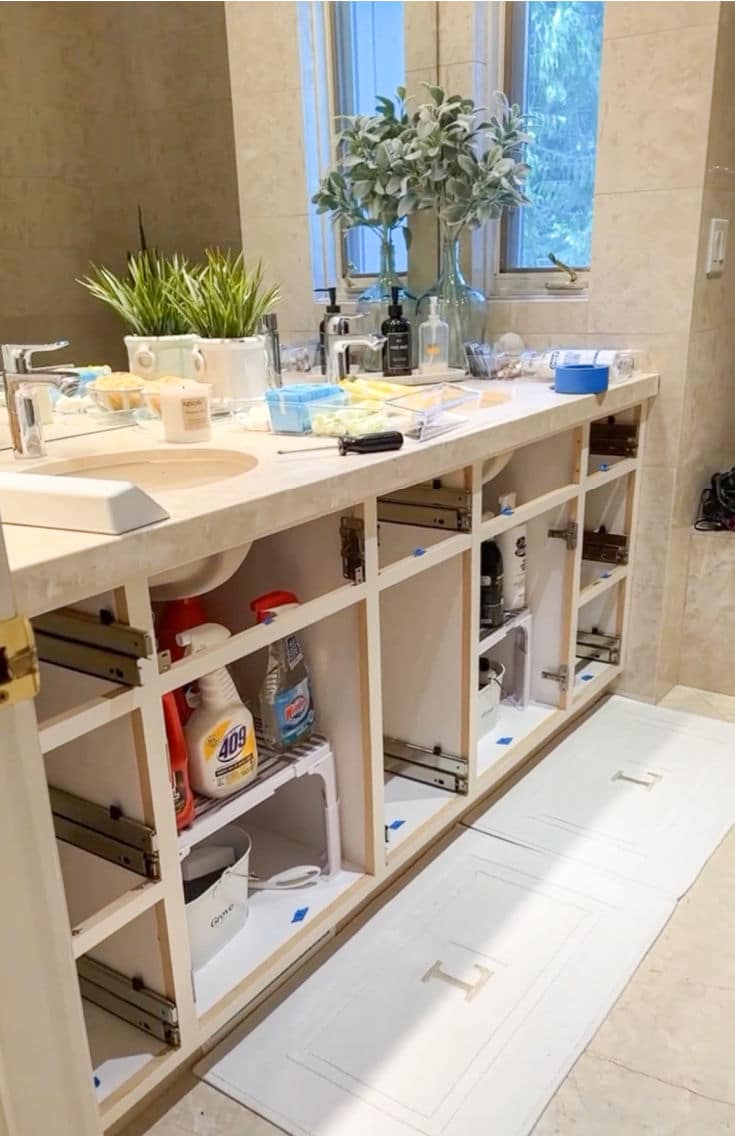
Step Three: Prep Your Space
- First, empty your drawers. Bonus: This is the perfect time to organize your stuff. Get rid of expired items or things you’re no longer using.
- You don’t need to empty your cabinets, but you might want to organize them too. I did this a bit while I was waiting for the cabinet paint to fully cure.
- Next, it’s time to remove your cabinets. This was honestly the hardest part of the whole project. My cabinets are about 20 years old. The mechanisms are not very common. I spent quite a bit of time researching on YouTube and beyond looking for online tutorials that would help me with my cabinets. I never found my exact ones, but I did get ideas that helped me finally figure it out myself.
- Most cabinets you can easily, find tutorials for how to remove the cabinet doors.
- Next, to help you reinstall all your drawers and cabinets correctly, I suggest numbering each piece. I added a small, numbered piece of painter’s tape to each drawer and cabinet and their corresponding spots.
- Fourthly, it’s time to add painter’s tape to the edges of all your cabinets. Apply the tape carefully. After it’s on press and smooth an additional time so there are no air bubbles for sneaky paint to get through.
- Finally, make sure you have your drop clothes arranged well. I like to use painter’s tape to help them stay put.
Step Four: Prep Your Surface
- With Fusion Mineral Paint you usually don’t need to do any prep except basic cleaning with a cloth and a mild soap. This will remove surface dust and dirt.
- You don’t need to use a primer with Fusion Mineral Paint.
- If you are trying to prevent bleed through or knots from coming through you will need a specific tannin blocking primer called ZINSSER BIN Shellac based primer. Use one to two coats.
- If your project is dark and you want to go to a bright white color, consider using a transition color such as Sterling for your first coat. Using a lighter mid-tone color will act as a transitioning primer making the switch to whites easier.
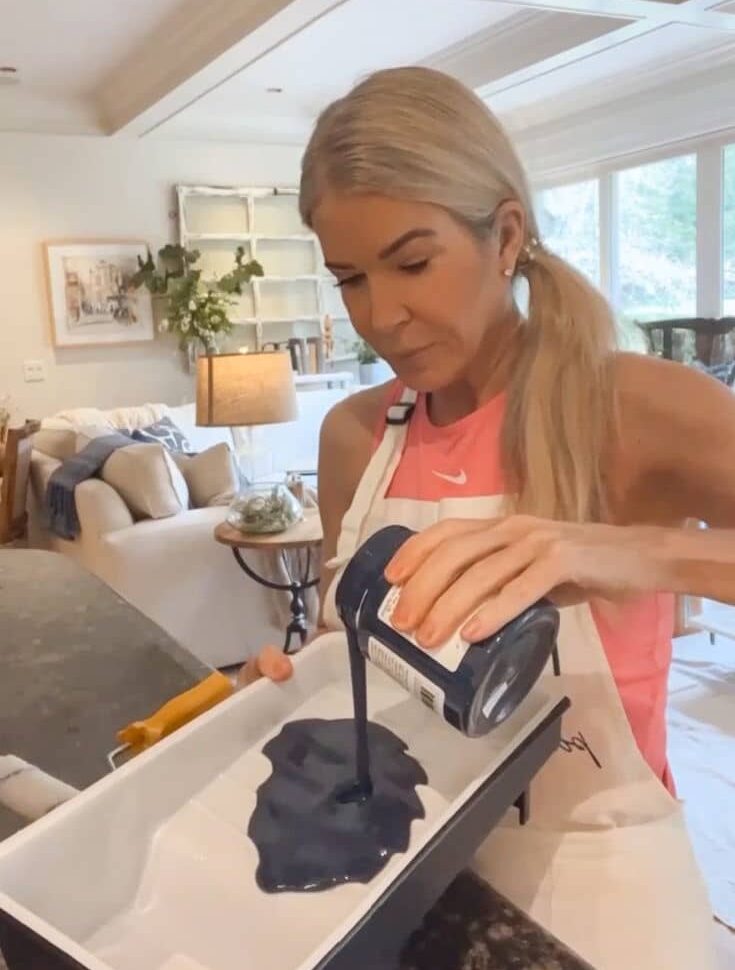
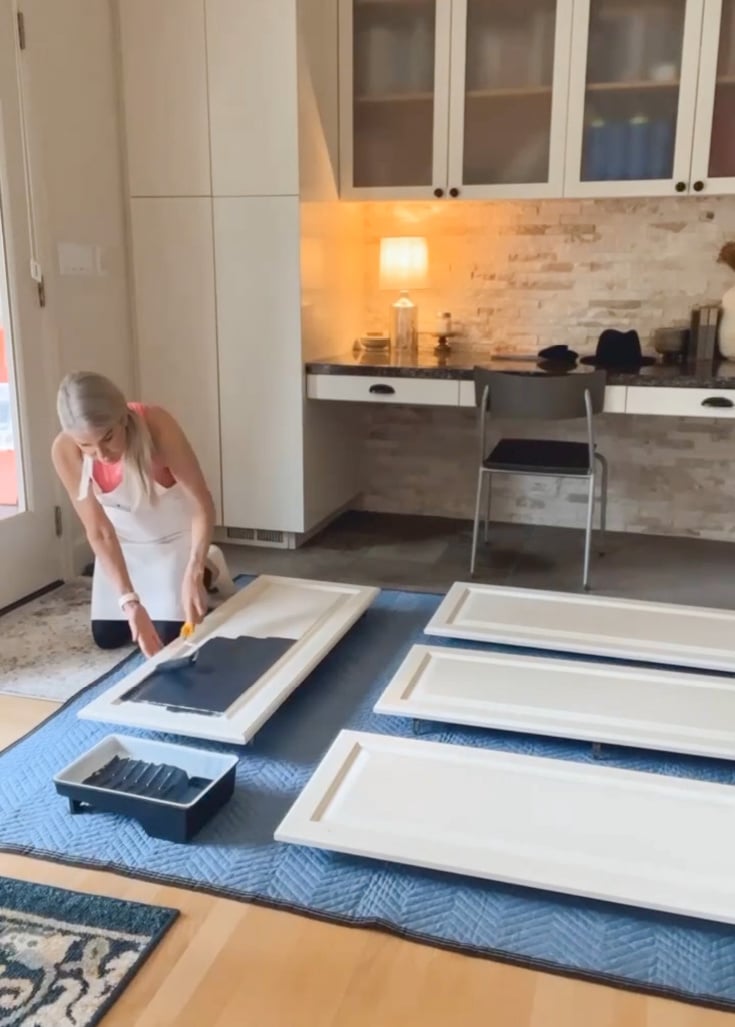
Step Five: DIY Bathroom Cabinet Painting Time
At last, it’s time to paint.
Key tips if using Fusion Mineral paint:
- Because Fusion Mineral paint dries quickly it’s important to move quickly. If you want more time, you can add Fusion Mineral Paint’s product called Extender.
- It’s also important to not go over any area again before it’s completely dry.
- Make complete brush strokes. Do not start and stop as you paint.
- Mineral paint is easy when applying to small areas like cabinets or furniture. When painting walls, you need to make sure to follow these guidelines. I recommend using one of their rollers and adding the extender when applying to walls.
- You can apply a second coat after approximately two full hours of drying.
- To get the full tutorial from the brand themselves, visit their informative guide for how to paint with Fusion Mineral Paint.
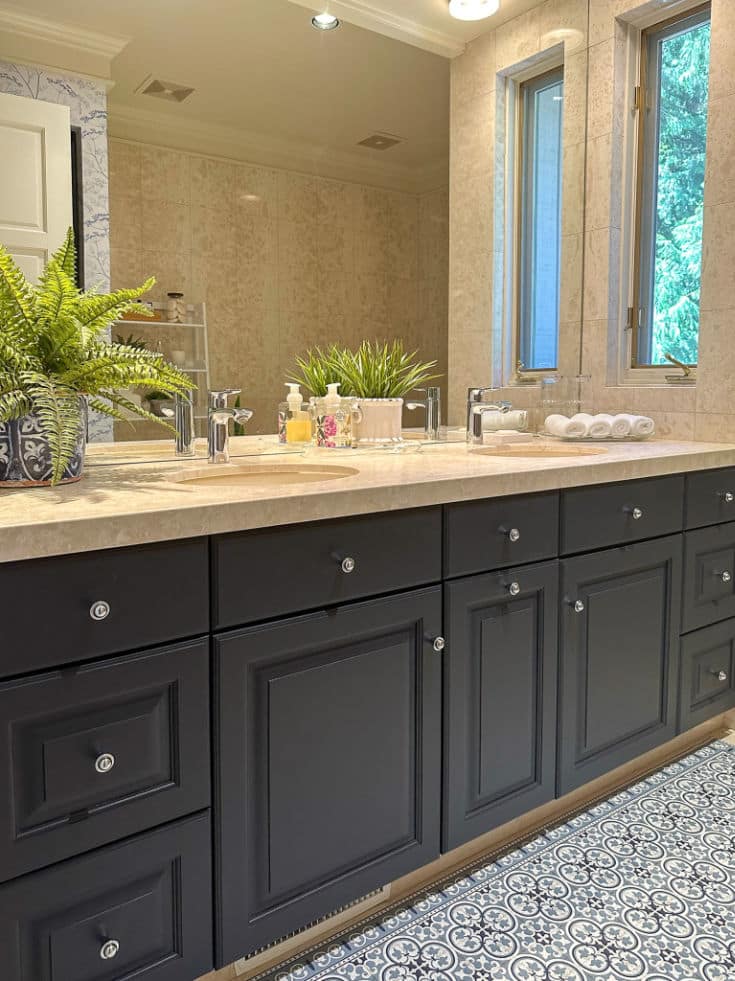
Here is the finished look.
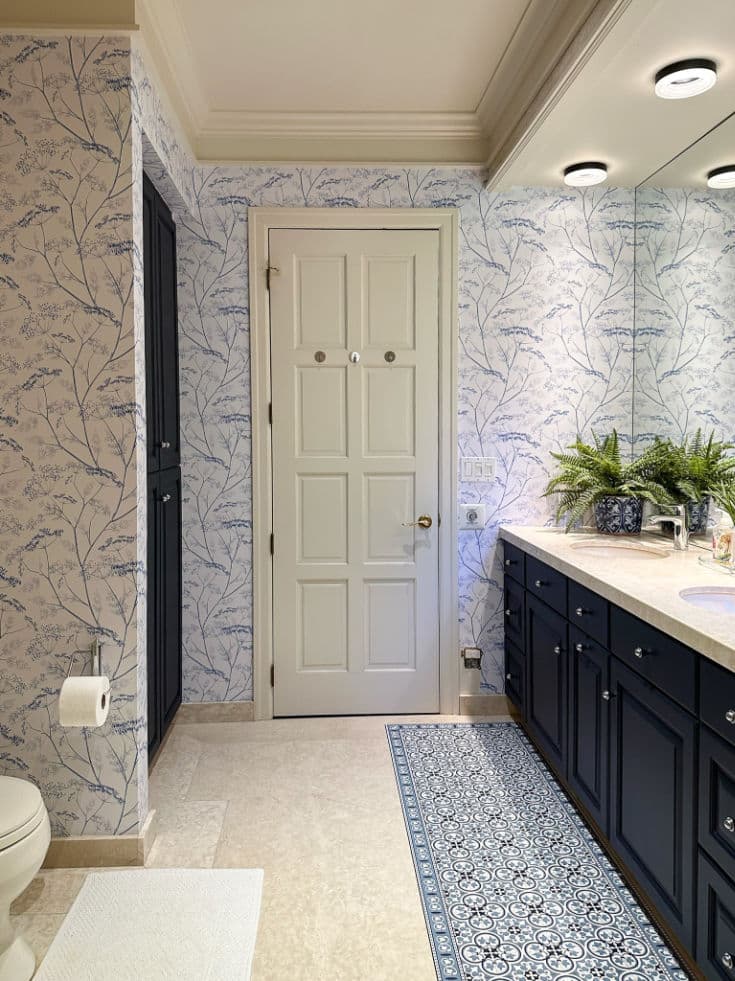
Peel and Stick Wallpaper
The next project I tackled was adding peel and stick designer wallpaper. It added a lot of style to the bathroom, don’t you think? I shared three options I was considering on my Instagram stories and asked my followers to help me decide. They helped me choose this one, and I’m so glad they did.
The wallpaper is called Denim Blue Botanical Wildflower Removable Wallpaper and it’s created and sold by Livettes Wallpaper. They are also on Instagram @livestteswallpaper.
For my best tips and advice for applying peel and stick wallpaper read our blog post.
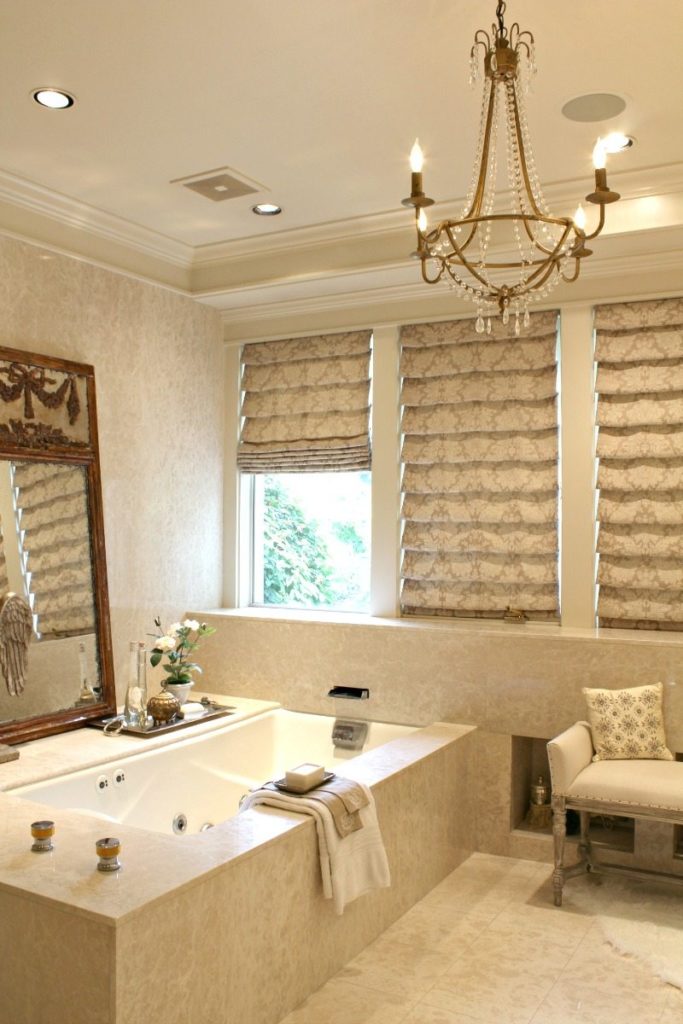
Final Styling to Complete DIY Bathroom Cabinet Painting and Refresh
Don’t underestimate the power of detail, especially in a small space like a bathroom. Once the painting and wallpaper were complete, I turned my attention to creating the finishing touches.
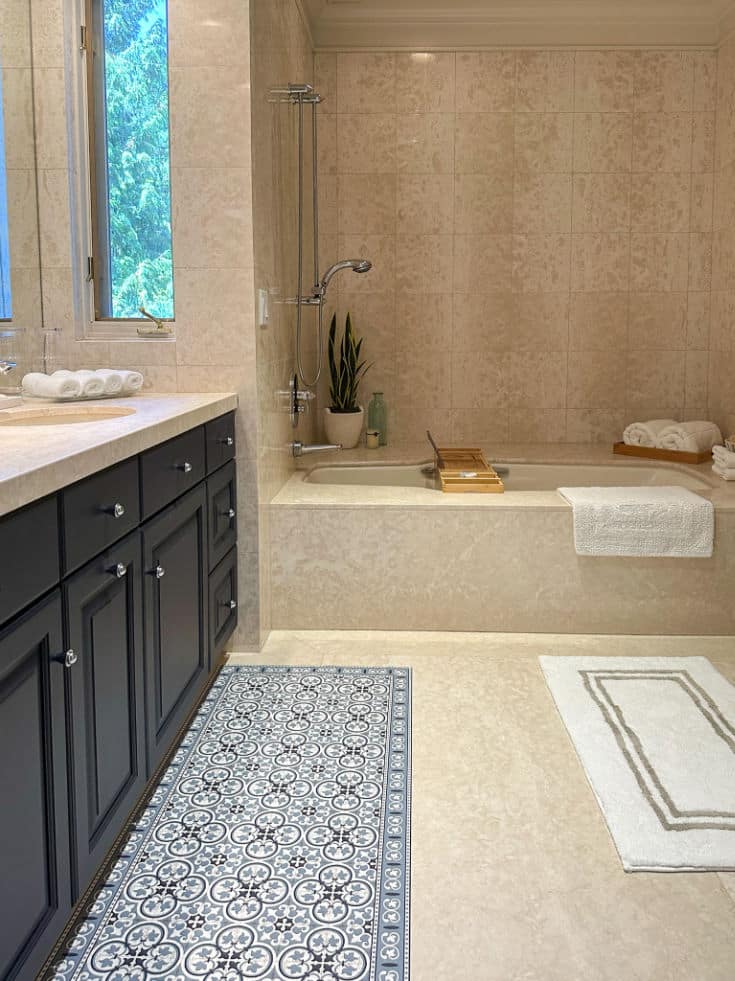
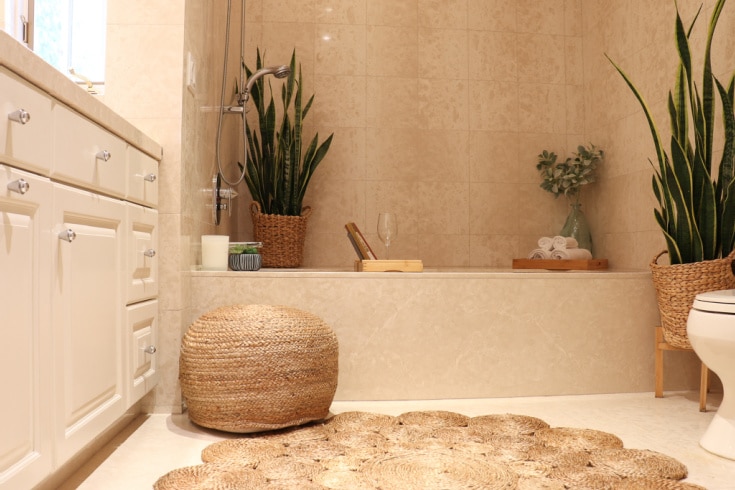
As you can see in the photos I made a powerful statement with the gorgeous V-Mat vinyl rug I chose. I am absolutely over the moon about this product. I have their mats in my laundry room and kitchen.
Additionally, these mats are stunning. We have a generous coupon code for all our followers to save 15%. Use our code JULIE15 across their whole site. Shop V-Mat Home mats here.
So Many Reasons I Love These Mats
I love the fact that V-Mat Home rugs have a thin profile. Most bathroom rugs are thick. Sometimes that’s fine, but the door to this bathroom was so close that I could never find a rug that would allow the door to open without catching it. I finally solved that problem beautifully with my V-Mat Home rug. The style I chose is called World Vinyl Mat. The size I chose was a runner size 2′ x 6′.
I love the fact that V-Mat Home offers many styles and designs to choose from. On top of that, most come in a variety of shapes and sizes to best fit your unique home needs. They even offer custom sizing.
Finally, I adore the way they wear. I’ve owned them for years, and I have yet to see any change over time. They don’t stain at all. You can easily wipe them clean no matter what you, your family or your pets put them through. That’s quality and value.
I hope you enjoyed my bathroom makeover.
I hope it gives you lots of tips and ideas to make over either a bathroom or any other space in your home.
More Budget Friendly Bathroom Makeover Ideas
Relaxing Bathroom Retreat: Create a Luxury Spa Oasis
Learn how to create a spa experience in your own home without taking out a second mortgage after all.
Create Chic Boho Bathroom Decor in Minutes: 5 Easy Budget Ideas
Lastly, we’re going to show you how fast and easy it is to take a boring, blah bathroom and turn it into a stylish boho chic bathroom quickly and without spending a lot.

Looks great! Did you brush or roll your project? Did you paint the inside surface of the cabinet doors? Did you remove the hinges from the backside of the cabinet doors? Did you put on a second coat? I have Fusion paint and really like it for projects. Thank you for your help, Elle
Hi Elle,
I used a combination of rolling and brush, but mainly rolling with the mini roller for the cabinet doors. I painted both sides of the doors. I removed the hinges to paint, yes. And I painted 2 coats. Good luck with your projects. Don’t forget to use our savings link to save (in the post and on our coupon page). XO ~ Julie