Table of Contents:
- Why Did Pumpkins Become Associated with Fall?
- Supplies Needed for Braided Yarn Pumpkins
- Make these Yarn Pumpkins in Just 4 Easy Steps
- Frequently Asked Questions
- Can you use a non-carve-able pumpkin to make braided yarn pumpkins?
- How many braids do you need to make one braided yarn pumpkin?
- How long did it take to make each braided yarn pumpkin?
- Can you use different types/thickness yarn?
- What if you can still see the color of the pumpkin peeking through the space between the yarn braids?
- More Fall Crafts
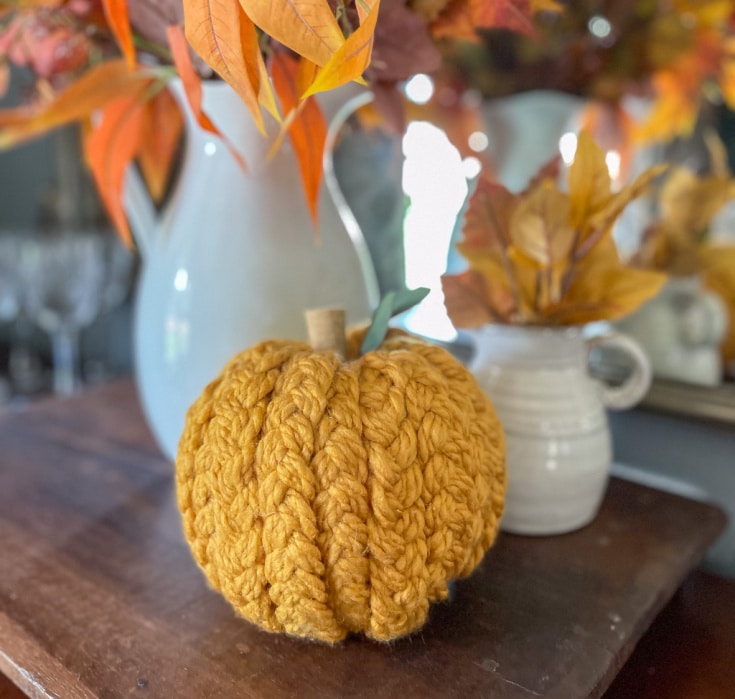
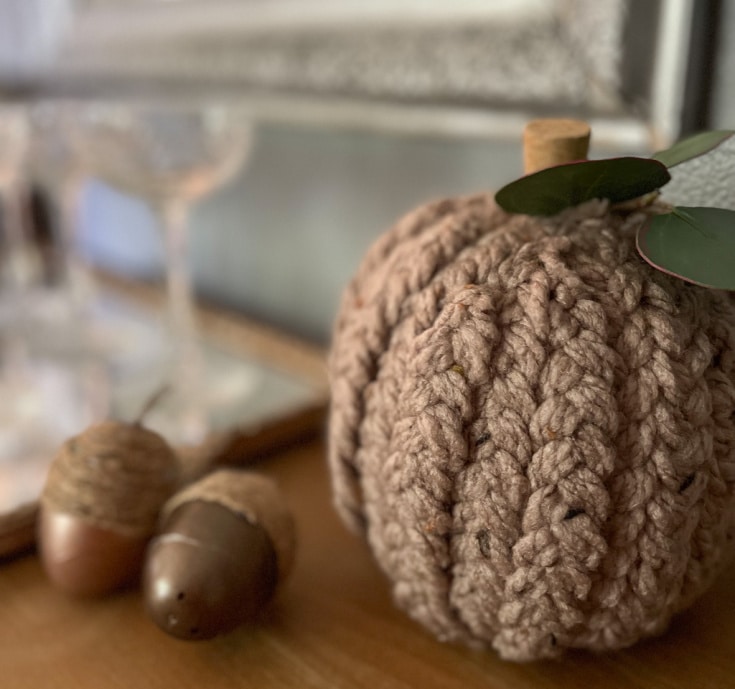
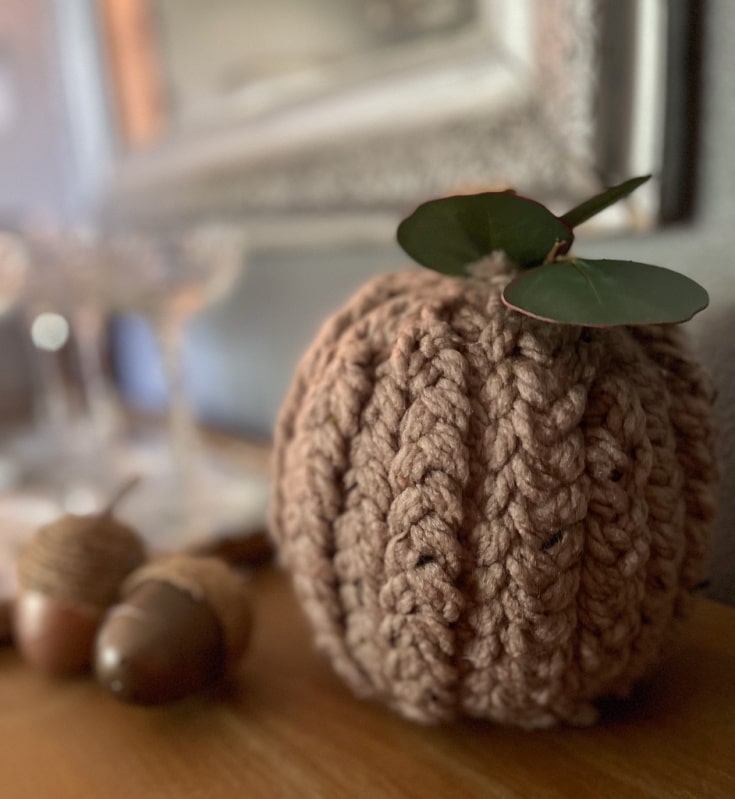
Make the Cutest Yarn Pumpkins, fun craft for the entire family, create DIY fall decor quick & easy!
Saying goodbye to summer isn’t always easy. Some love the cooler temps and others mourn the end of summer every year. But there are many reasons to welcome fall. Cooler temperatures mean a return to indoor activities. This means it’s the perfect time for fun craft projects that get your creative juices flowing. Our adorable, braided yarn pumpkins are the perfect introduction to fall festivities.
Why Did Pumpkins Become Associated with Fall?
Some of us may take it for granted that pumpkins equal fall, but how did it all start and what exactly was the significance of pumpkins that led to today’s strong association.
The history of decorating with pumpkins is rooted in the cultural and culinary significance of pumpkins in North America, with Halloween and Thanksgiving playing a significant role in shaping the tradition of carving and using pumpkins for decoration. Over time, this has evolved and become an important aspect of seasonal celebrations and home decorating.
- Native American Traditions: Pumpkins are native to North America, so indigenous peoples like the Native Americans were among the first to use them. They used pumpkins not only for food, but also as containers, and for ceremonial purposes. They might have used pumpkin shells as bowls or even carved them for artistic expression, even rituals.
- Colonial America: Pilgrims and other European settlers learned about pumpkins from Native Americans. Pumpkins quickly became an important part of the colonists’ diets. Carved pumpkins may not have been as popular during this time, but they were still an important crop.
Supplies Needed for Braided Yarn Pumpkins
Choose between either type of pumpkin or do as I like to do, which is create some of each.
- Carve-able pumpkins
- Non carve-able pumpkins (if you’re using on-hand pumpkins)
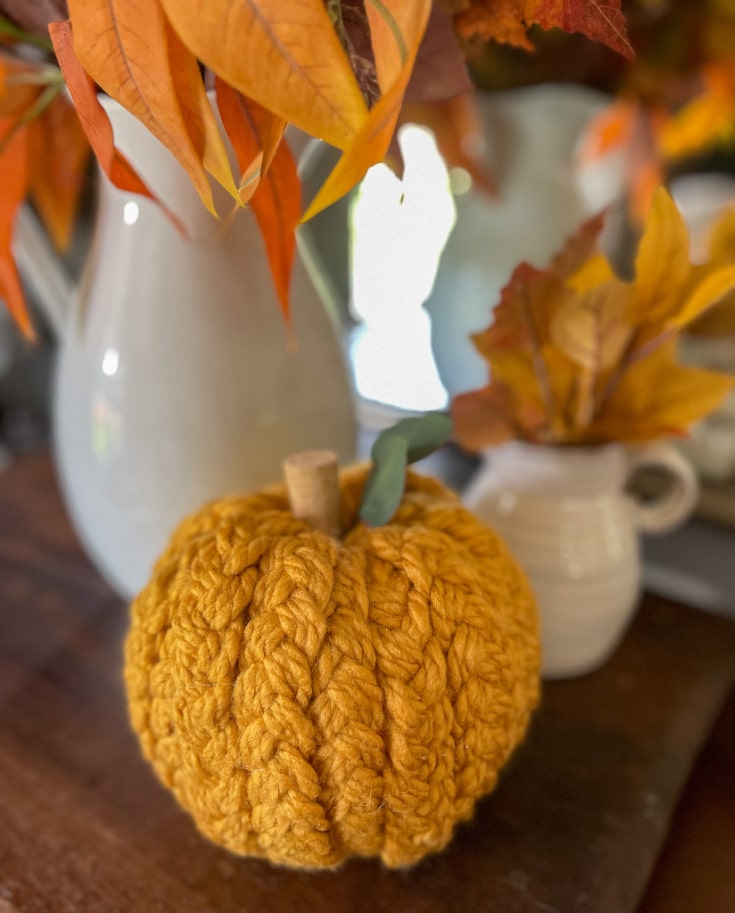
- Thick yarn (85 g)
- Corks
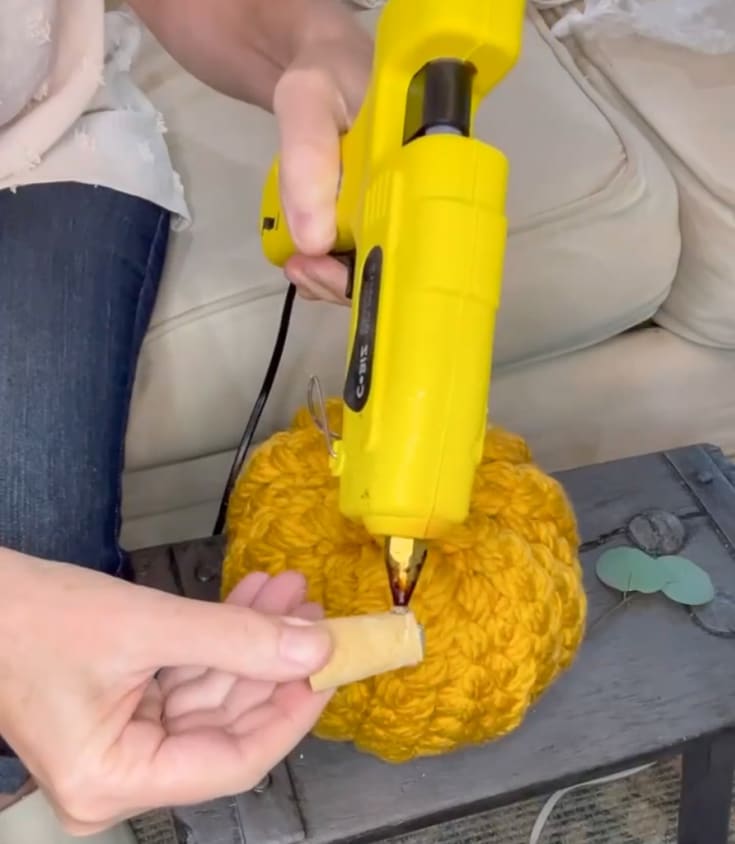
- Hot Glue gun
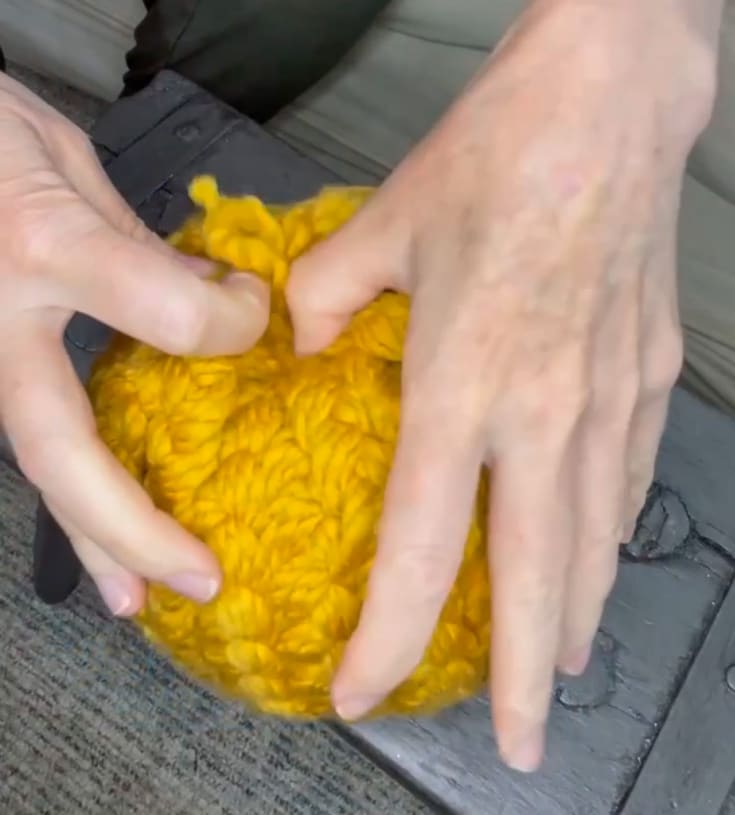
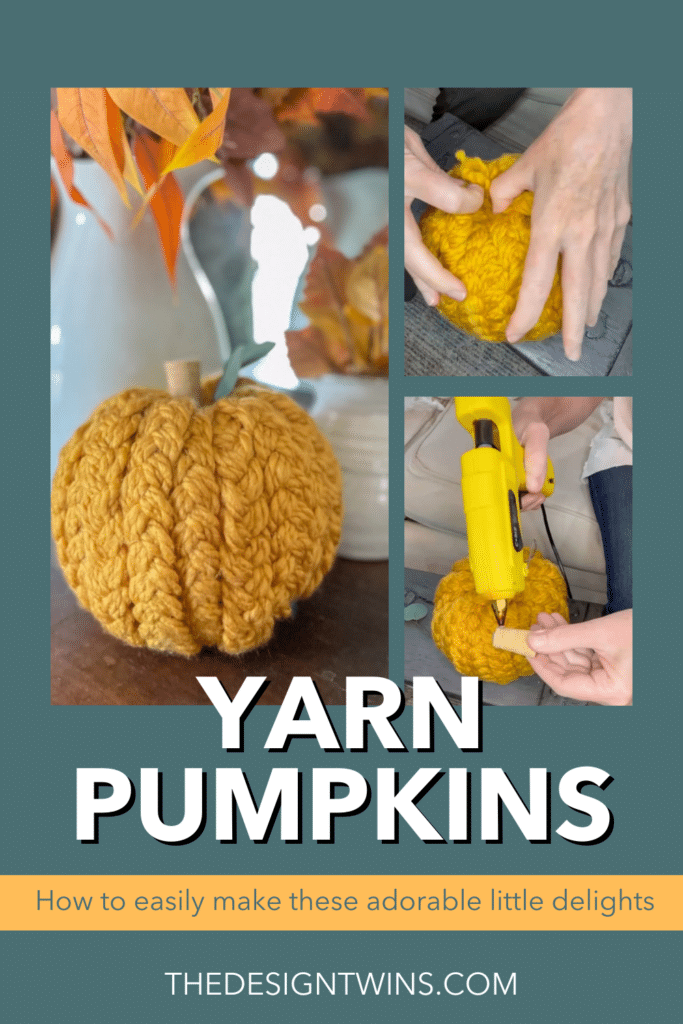
Make these Yarn Pumpkins in Just 4 Easy Steps

- Use a craft knife or kitchen knife.
- If working with children, have an adult do this step in advance.
- If hosting a craft night, you may want to complete this step also in advance.
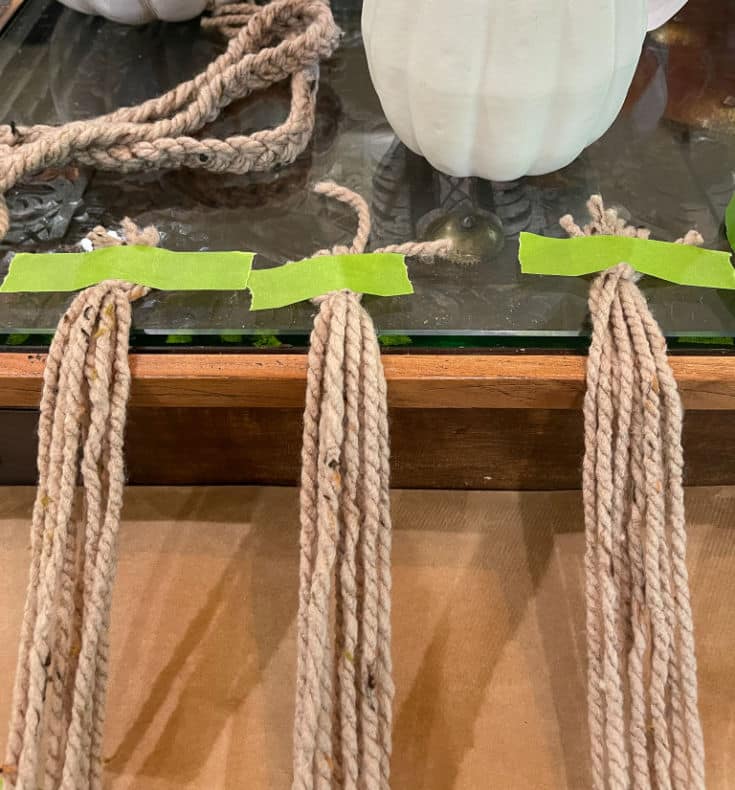
- To make the yarn easy to braid, I tied a knot on one end of the 9 strands.
- Then I used painters’ tape to secure the braid to the table.
- Leave a couple of inches at the end of your braid, so you can tie the ends in another knot.
Frequently Asked Questions
Can you use a non-carve-able pumpkin to make braided yarn pumpkins?
- Yes, and I actually made my first one with a non-carve-able pumpkin.
- This is a good idea if you have old pumpkins on hand that you want to use without buying MORE pumpkins.
- The downside is that you need to find a way to hide the tied ends.
- You can glue the knot of the braid to the pumpkin, and then when it’s dry and secure, you can trim off all the yarn ends.
- Another downside is that I ended up having to make a lot more braids of different sizes to try to cover the whole pumpkin.
- In my opinion it isn’t as smooth of a look but when it’s all done it’s hard to really tell.
- Therefore, if you have a lot of non-carve-able pumpkins on hand, you can opt for this method.
How many braids do you need to make one braided yarn pumpkin?
- That depends on the size of your pumpkin and how long you make your braids. I honestly lost track of how many I made.
- You should be able to cover a small pumpkin with one skein of yarn and still have some yarn leftover.
How long did it take to make each braided yarn pumpkin?
- The carve-able pumpkin was much faster because it took fewer braids, and it was a lot easier to attach the braids (by sticking the ends into the holes). It took about 2 hours.
- The non-carve-able pumpkin took much longer because I had to make a ton of braids and I spent a lot of time trying to find a way to attach the braids without creating a bulky area where you could see all the ends. It took about 3-4 hours in total. (Is it just me or do other people lose track of time when they are crafting?)
Can you use different types/thickness yarn?
- Yes, you can use any type of yarn you want.
- Just keep in mind that thinner yarn is going to make thinner braids and the project might end up taking a lot longer to cover the pumpkin.
What if you can still see the color of the pumpkin peeking through the space between the yarn braids?
- To keep the braids from moving around and revealing the color of the base pumpkin I added a bit of hot glue to secure the braids in place.
- Another idea to prevent color from showing is to paint the pumpkins in a similar color to the yarn BEFORE adding the braids.
- If you don’t want to add the extra step of painting (I didn’t), just secure the braids with hot glue, and line them up closely next to one another so there is no space to see the pumpkin. This is what I did.
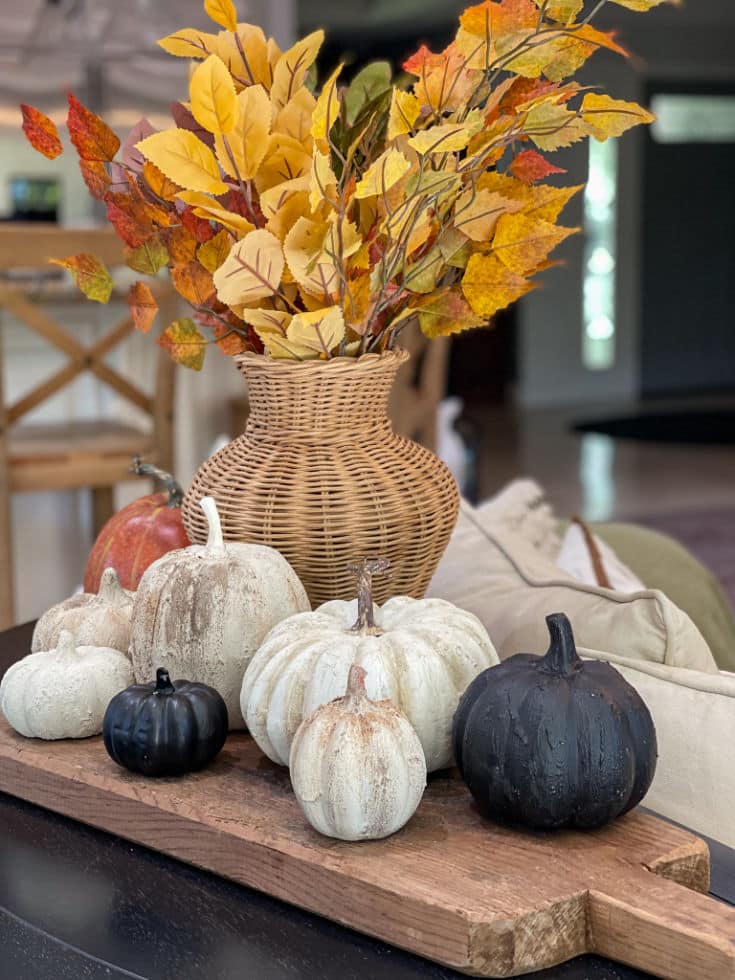
More Fall Crafts
Fall Pumpkins: How to Easily Make Costly Pottery Barn Look for Less
Do you love the look of expensive stone fall pumpkins but hate the price? Us too! That’s why we know you’re going to love this easy DIY. In this post we are going to take you step-by-step so you can create the enviable Pottery Barn look with faux stone pumpkins at a fraction of the cost. And you’re going to have fun along the way. Promise! Let’s make some stone pumpkins!
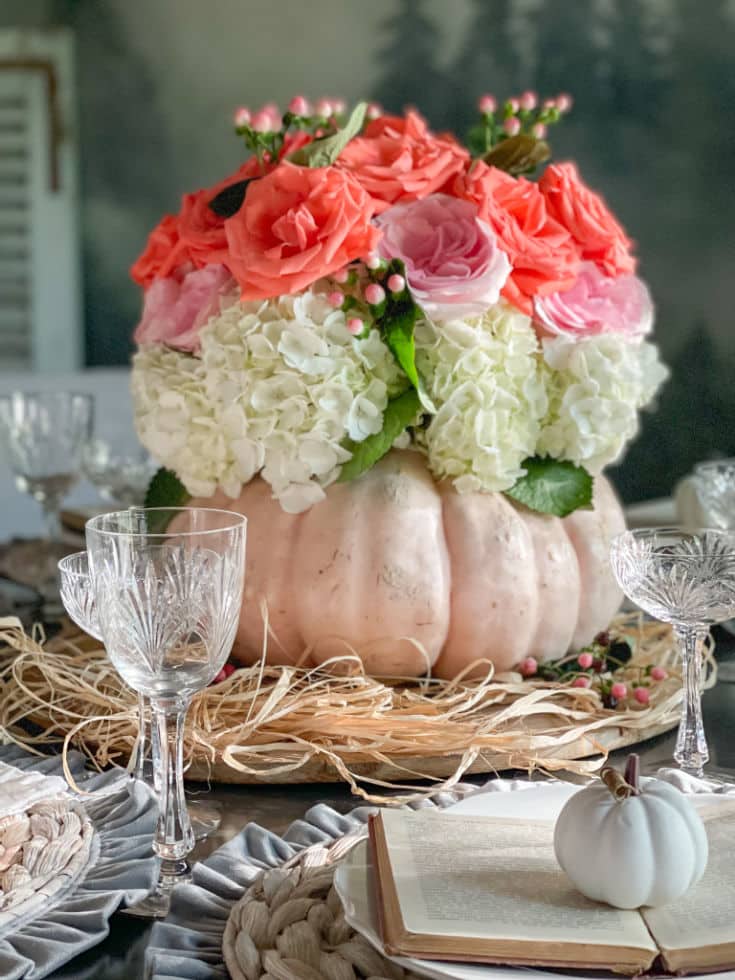
How to Make Easy DIY Floral Pumpkin Vase for Spectacular Centerpiece
Want to create an amazing centerpiece that will wow your guests? Here is the easy step-by-step tutorial for a gorgeous DIY floral pumpkin vase.